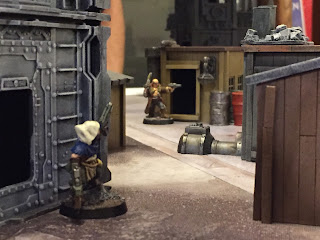
So the title may be a bit misleading. In reality, I have been anything but bored with Puppet Wars so far. The game is great and every time I play, I look forward to my next game. The same has been true for painting the models. I am a slow painter by any standard, but these puppets have easily managed to keep my interest. The nice thing about the models is they are small and relatively easy to paint. As soon as I’m done with one, I’m anxious to start another. Even better, anytime I am feeling a lack of motivation with one, I can pick up another model and get a basecoat completed quite quickly.
As I steadily increase the number of finished paintjobs (7 and counting, woot!) I am eager to get them to a truly finished state and that means bases. Lots and lots of bases. Before I'd even picked up the game, I had decided to go with a simple hardwood floor base. This would keep things simple and clean looking and has the added benefit of matching the game board.
As it turns out, there are a number of ways to make wood bases and when it came to actual technique, I had two considerations. First, I wanted to make sure I didn't add to the size of the bases. Having mounted the puppets on standard GW bases for painting, I found that even these are slightly too large for the game board. They started small and I'll make sure they stay small!
I also wanted to make sure that whatever basing scheme I chose would be easy enough for me to complete. With my puppet collection growing to more than 60 models now, I don't want this to turn into another project I never finish. As such, I've made the conscious decision that anything I can to to make completing the project easier I will do, so long as it doesn't compromise the appearance of the models.
That said, I think I came up with a method for these bases that achieves the look I want while still being easy to replicate on a large scale and complete quickly. So here we go!
 |
| Step 0 |
 |
| Step 1 |
Step 0: This is the standard Puppet Wars base, with two peg openings, one in the center and one slightly off center.
Step 1: I decided to use a large Balsa strip for all these bases. This makes the process cheap and easy to complete several bases in one go. Once the glue has dried, I cut the bases out of the strip and sand them flush with the edge of the base.
 |
| Step 2 |
 |
| Step 2 complete |
Step 2: To make the appearance of individual planks, I used a piece styrene stamped into a hardwood floor pattern. I picked pretty large planks, as I wanted the puppets to retain their small feeling. With my sculpting tool, I transferred the styrene pattern onto the balsa wood, taking care to make sure the planks stayed parallel with the grain on the balsa. This is the result.
 |
| Step 3 |
Step 3: After the pattern has been made, I go back over the base with my sculpting tool and hobby knife to really make the divisions between the planks stand out. This will also help to keep the planks looking separated after they’ve been painted.
This step will make the pattern you make more permanent. As I found to my dismay, just transferring the patter leads to thicker and ill defined lines that really must be cleaned up with a knife.
 |
| Step 4 |
Step 4: Again with the sculpting tool, I carve the perpendicular lines into the balsa to give the effect of ends of boards. Because I’m going against the grain in this step, the grooves will be messier, but this works well as we’re trying to create the look of worn and weathered flooring.
Step 5: I added some more detail to the base with my hobby knife. I added nail holes and chips and breaks in the board.
 |
| Step 5 |
 |
| Step 6 |
Step 6: Rather than painting the wood, I’m letting the grain do what it wants by staining the base with inks and washes. In this case, I simply used several layers of Sepia wash, but I’m experimenting with other colors. Inks work as well, but will give a more vibrant, wet looking color. I've also like the look of GW Scorched Earth cut with water into a wash. Devlan mud, however, the usual go to wash, proved a bit washed out and boring for a floor.
Finally, you have to make sure you varnish the base. I'm still experimenting with just the right technique here, and going back and forth between gloss or matte, but from my tests so far, it looks like varnish is important as soon as possible, even before the wash is completely dry. Without a quick coat of varnish, the wood will fade over time. I'm still testing the long terms effects of the stain, but I'll keep you posted.
A simple black coat around the bottom of the base and it’s all done. I've chosen to varnish the black around the base with a very high varnish as it will give the models a very 'game piece' feel.
So that's about it for now. I'm getting back to painting!
More to come.
-Nick


Comments
Post a Comment