Visions of Confluence: Upon this Ground
 When I first started to build terrain for Malifaux, I had a number of ideas for boards to create and themes to visit. Knowing I'd have to settle on one to begin with, I eventually settled on the concept of a mining/frontier town.
When I decided what I wanted to build, I thought it would also be fun and interesting to build the town in a similar way to which towns are really built. Of course, when building game terrain, this means creating the land first.
 In an older post, I talked about the process for creating my rock outcroppings, but so far I think I've only shown completed pictures of my forests. While I could go into all of the details about how I created the forest, I really couldn't explain it any better than the folks over at 3T Studios, who came up with a great tutorial on what is essentially exactly the same process I use. When I went to hyperlink the article however, it seems to have been lost, but I was able to find a copy of it at DakkaDakka.
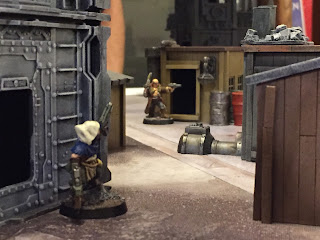
 From the pictures, you can see that I wanted a dynamic look to the ground, so I used several different shades. For those areas that were going to be largely barren, windswept earth, I used an extremely fine sand (well, silt or dust, really) and took their highlights much higher than the rest of the rocks. As Confluence was to be more of an arid western town, didn't go very far in adding vegetation, settling on dry grass and just a little bit of scattered greens. A trip to Colorado mid-build was great for color reference.
 The trees were added once every other step had been complete. To get them in place, I used a power drill to bore a hole into the hill where I wanted the tree, then simply hot glued them in place. I was even able to get my daughter involved in the process. She has become an expert "stick the tree in that hole"-er.
 The nice thing about these forests is that they are usable for almost any game system. I will admit that I am a terrain builder, so the stuff I create is not always the most friendly, particularly when playing games like Warhammer. However, most people who play with the terrain don't mind sacrificing a bit of playability in return for the looks.
With the base of my terrain built and a good foundation laid for Confluence, it was time to look at the next steps...settling what would one day be the town.
More to Come,
-Nick

Love the picture with your daughter. Mine is too small for this kind of assistance yet but she's already expressed interest in miniatures and I think one day she'll join me in a similar way.
ReplyDeleteThanks a lot! It's been a blast having her around to do stuff like this. I say get her involved as early as you can. She now has a little desk set up right next to mine so whenever I'm painting, she can paint too.
Delete